Welcome to my first Card Tutorial. I hope to post tutorials at least once a month or more. Some will be made with the Cricut Machine and some will be stamped or quilled. If you have any suggestions for cards you would like to see, please leave me a comment and let me know what you would like.
The first card is a Valentine made with the Cricut machine. For this card I used the Artbooking cartridge. If you don't have this cartridge don't worry, I'll show you some options to make a similar card at the end of the post.

1 - 8 1/2" x 5 1/2" White Cardstock for card base
1 - 5 1/4" x 4" Pattern Paper of your choice (The paper I used is from the Doodlebug Sweetheart 6 x 6 paper pad.)
1 - 4" x 3 1/4" Water Color paper
Light Pink paper for doily heart and heart banner
Dark Pink paper for flower
Green paper for leaves
Spun Sugar Distress Ink
Picked Raspberry Distress Ink
Festive Berries Distress Ink
Ink Blending tool or ink dauber
Sentiment Stamp (Mine is from Simon Says Stamp Only Have Eyes for You stamp set)
Black ink
My Mind's Eye Collectable "I'm With" Enamel Dots
Adhesive and foam tape or pop dots.
As I mentioned above, all of these cuts are from the Artbooking cartridge. Cut size, page number and keys used are listed in the photos. You can click on the photos to make them bigger.
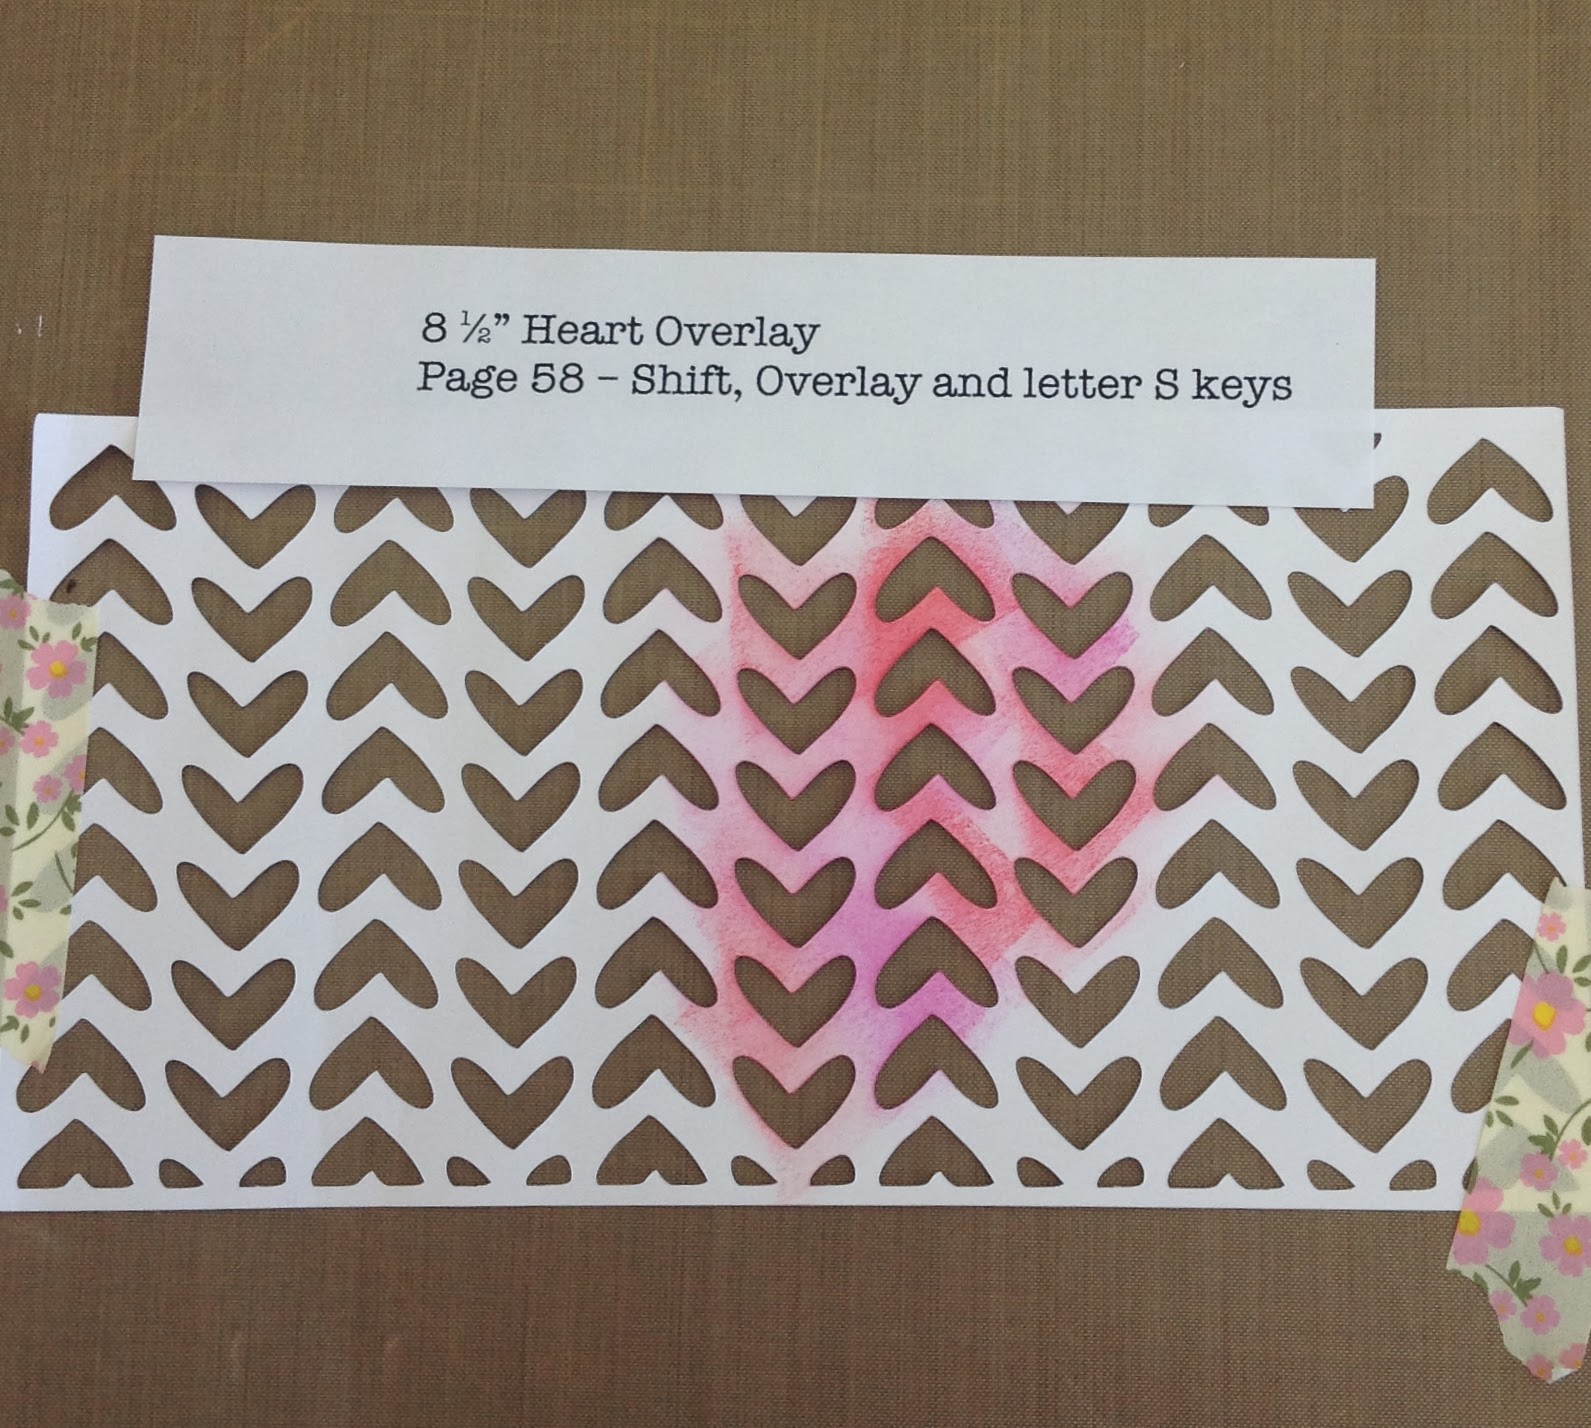


We will only use the heart from this cut, save the little banner for another card.


Using and ink blending tool or a dauber, ink a portion of the stencil with the Spun Sugar Distress Ink. Add some Picked Raspberry and Festive Berries Distress Ink over the Spun Sugar making sure to leave some of the Spun Sugar ink showing.

This is what your water color paper should look like after you are finished inking. I also used some of the Spun Sugar ink to ink the edges of the paper, it doesn't show up very well in the photo.


Referring back to the finished card:
Glue the pattern paper to the card base.
Add the inked heart water color paper to the card.
Stamp your sentiment in the lower left corner of the water color paper.
Attach the heart doily with pop dots or foam tape.
Glue the leaves to the back of the flower and glue them on top of the heart.
Add the enamel dots to the card and you are done!
If you don't have the Artbooking cartridge, this card would be pretty easy to duplicate with other cartridges.
Any cartridge that has a heart can be used to make the stencil. Cut rows of 1/2" hearts wide enough to fit your paper (I use the paper saver key). The little heart on the flower is also 1/2".
Doodlecharms has a scalloped heart. A plain heart would work well too. Cut the heart at 2".
Any flower and leaves can be used for the card. One of my favorite flowers is on the Plantin Schoolbook cartridge. Cut the flowers and leaves at 1 1/2". There is a heart on this cartridge too.
I hope you enjoyed this tutorial. If you make a card, please leave a link in the comments so I can see your card.
See you next time!
Cathy


